Toll-Free: 1-866-423-8525 I sales@clienttrack.ca
Toll-Free: 1-866-423-8525 I sales@clienttrack.ca
Ability to encrypt your email and upload files securely to your clients using our Outlook Add-In. Follow the instructions below on how to install and use our Outlook Add-In.
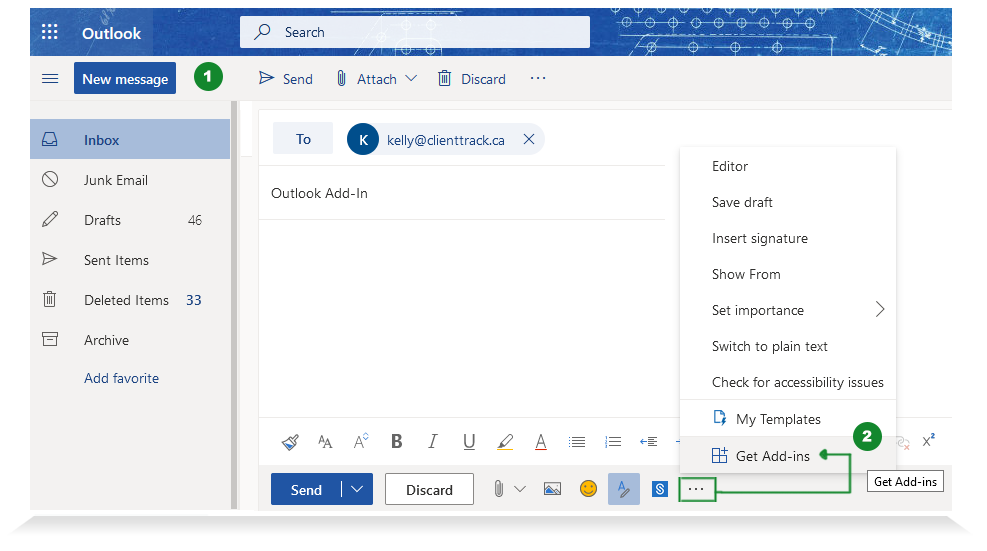
Step 1 - Get Add-Ins
Log into Outlook online. Click 'New Message' (1) and then click the three dots on bottom of email message and select Get Add-Ins (2).
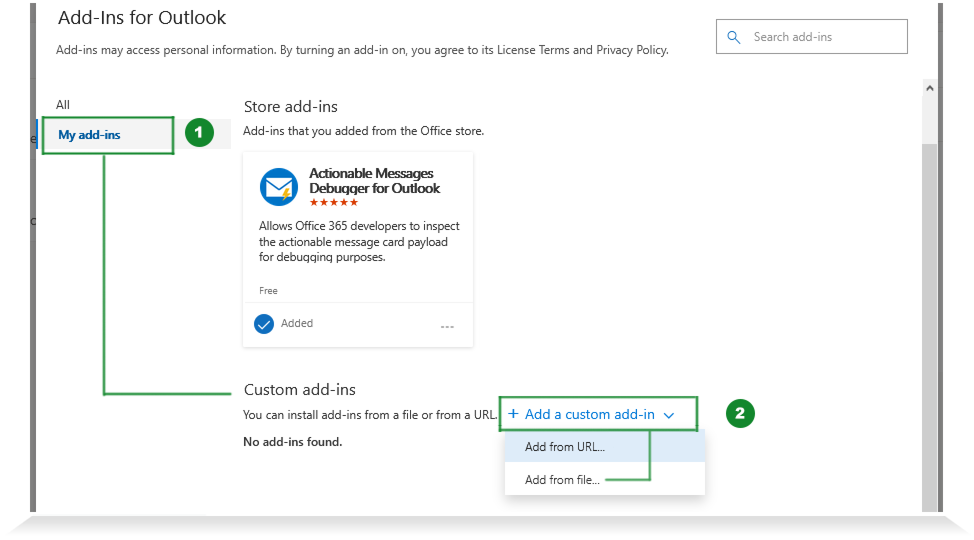
Step 2 - My Add-Ins
Click 'My add-ins' on left sidebar. Go to Custom add-ins section, click on Add a custom add-in and select Add From URL.
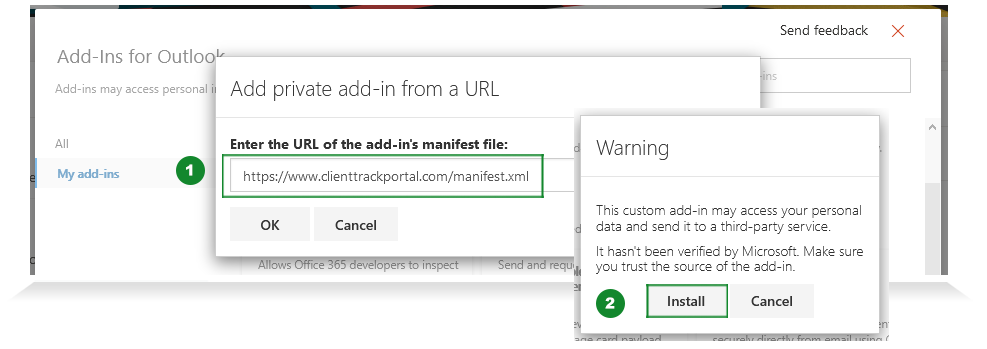
Step 3 - Add-In URL
Copy and paste the following Outlook Add-In URL in the white field box (1). Click Ok and then click Install (2).
https://www.clienttrackportal.com/manifest.xml
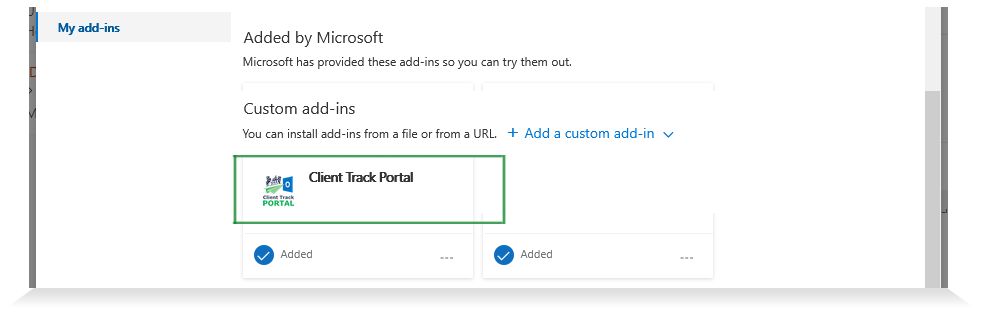
Outlook Add-In (Client Track Portal) has been successfully added to your custom add-ins.
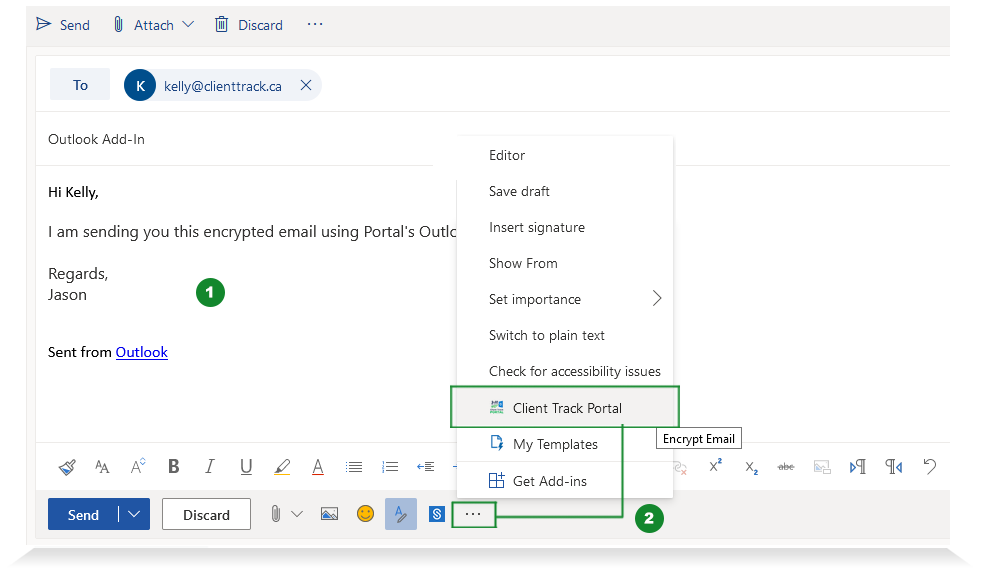
Step 1 - Outlook Add-In
Compose message and click on the three dots icon on bottom of email message. Select Client Track Portal (2)
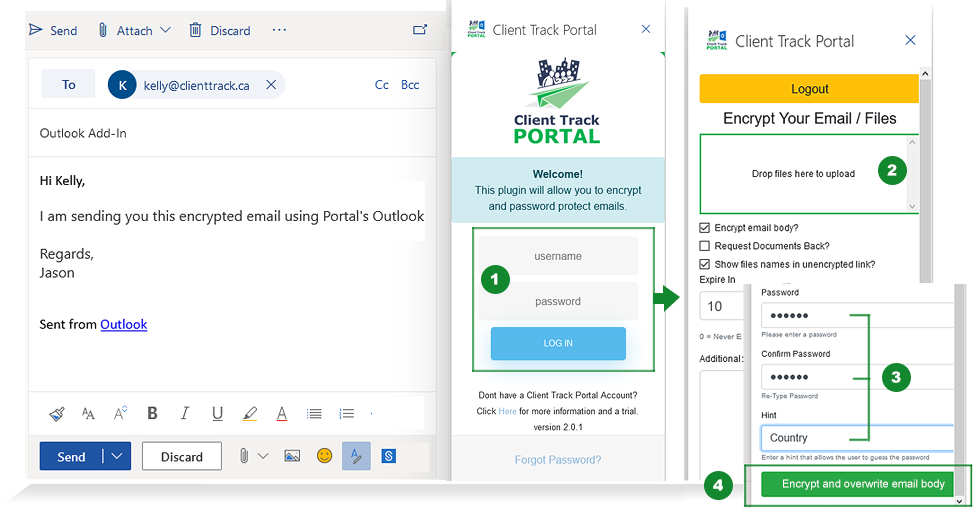
Step 2 - Encrypt Email
In the Encrypt Email window, upload your files by drag 'n drop (1), enter in expiry #, password and password hint (2). When ready, click on Encrypt and overwrite email body (3).
*Note - If you using the Outlook Add-In for the first time, you'll be asked to log into your Portal account on right sidebar.
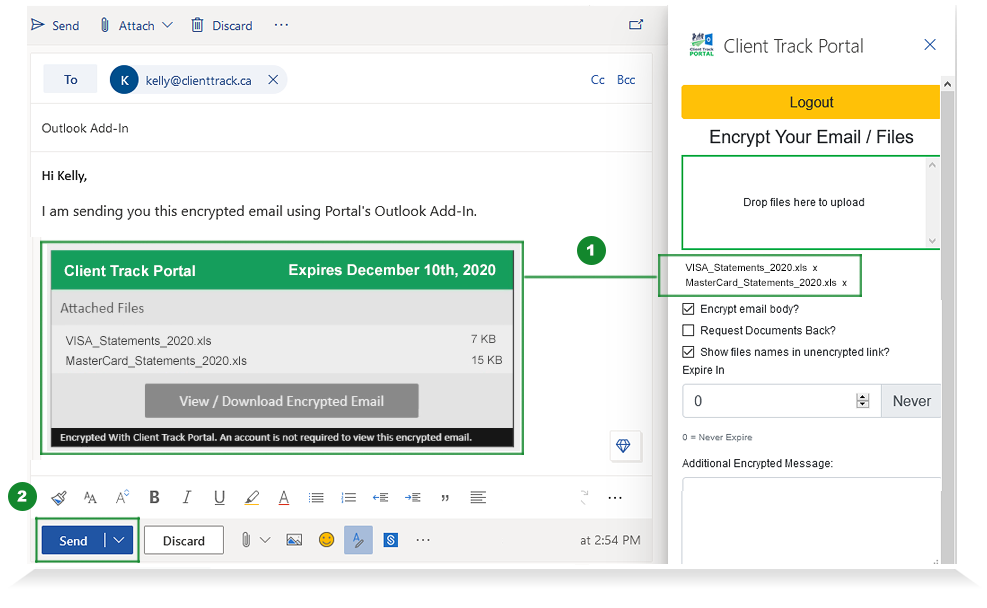
Step 3 - Send Email
After you've encrypted your email and verify all of the information in email message including attached files (1), click Send (2).
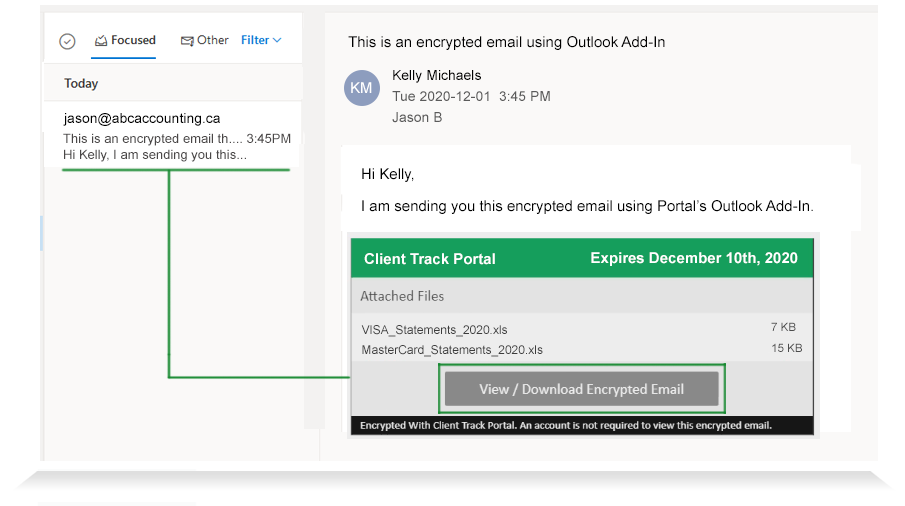
Step 1 - Email Notification
After email has been sent, the recipient will receive an email notification including a preview list of all of the uploaded files. To view the encrypted email content and files, click View/Download Encrypted Email.
*Note - No Portal account required to view encrypted email.
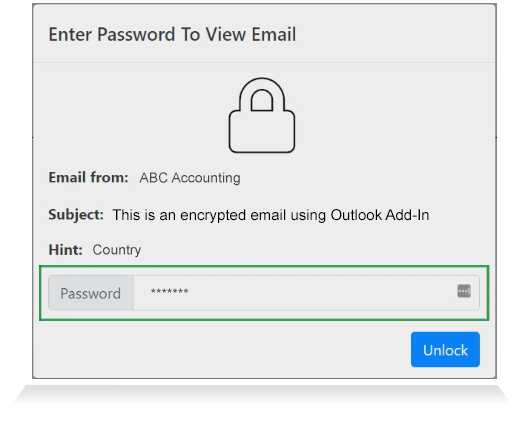
Step 2 - Unlock Email
Enter in the password based on password hint and click Unlock to view encrypted email.
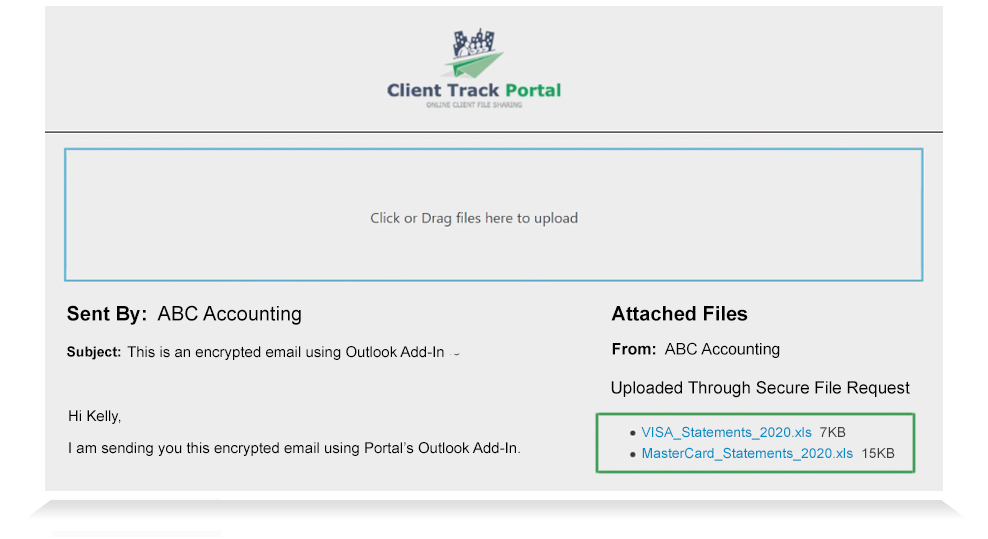
Step 3 - View Encrypted Email
In the encrypted email, you will see an email message from sender and attached files ready for download.
*Note - The encrypted email with attached files will expire based on deadline date as indicated in the email notification (See Step 1).
*Note - Demo video covers Outlook on the Web. *** If you are using Outlook Desktop, follow our tutorial here.
We offer a Client Track Portal app for your phone and tablet to make it more convenient for you! The app is compatible with Android devices and available for download.
Based in Ontario, CAN
TOLL-FREE:
1-866-423-8525
EMAIL: