Toll-Free: 1-866-423-8525 I sales@clienttrackportal.com
Toll-Free: 1-866-423-8525 I sales@clienttrackportal.com
Please follow these instructions to download our Portal sync.
Step 1 - Download Portal Sync
To use our Portal sync you will need to download the zip file by clicking the button below.
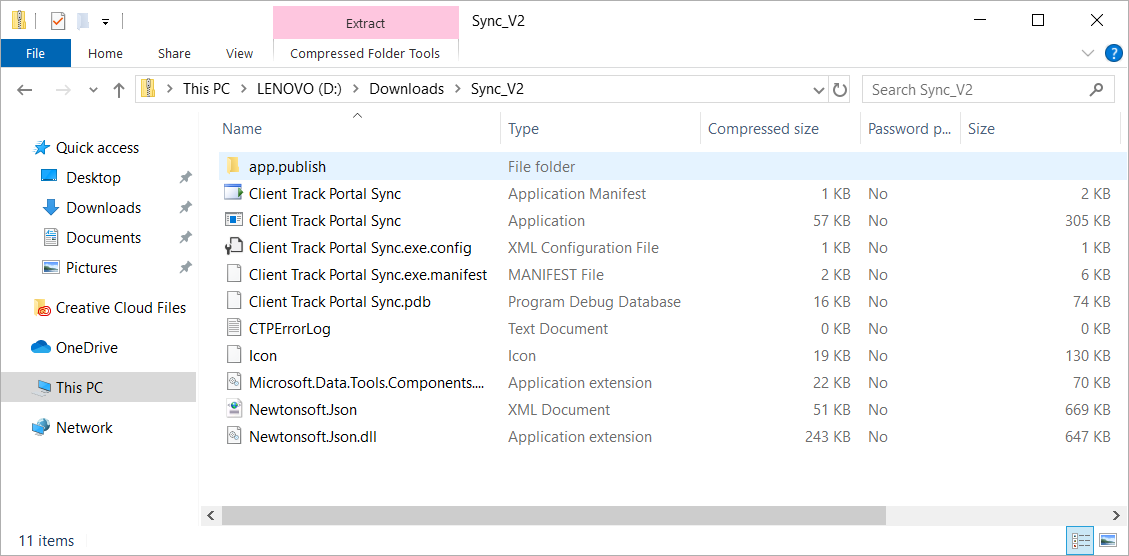
Step 2 - Open the Downloaded File
Click the downloaded zip file and open it up in your file explorer
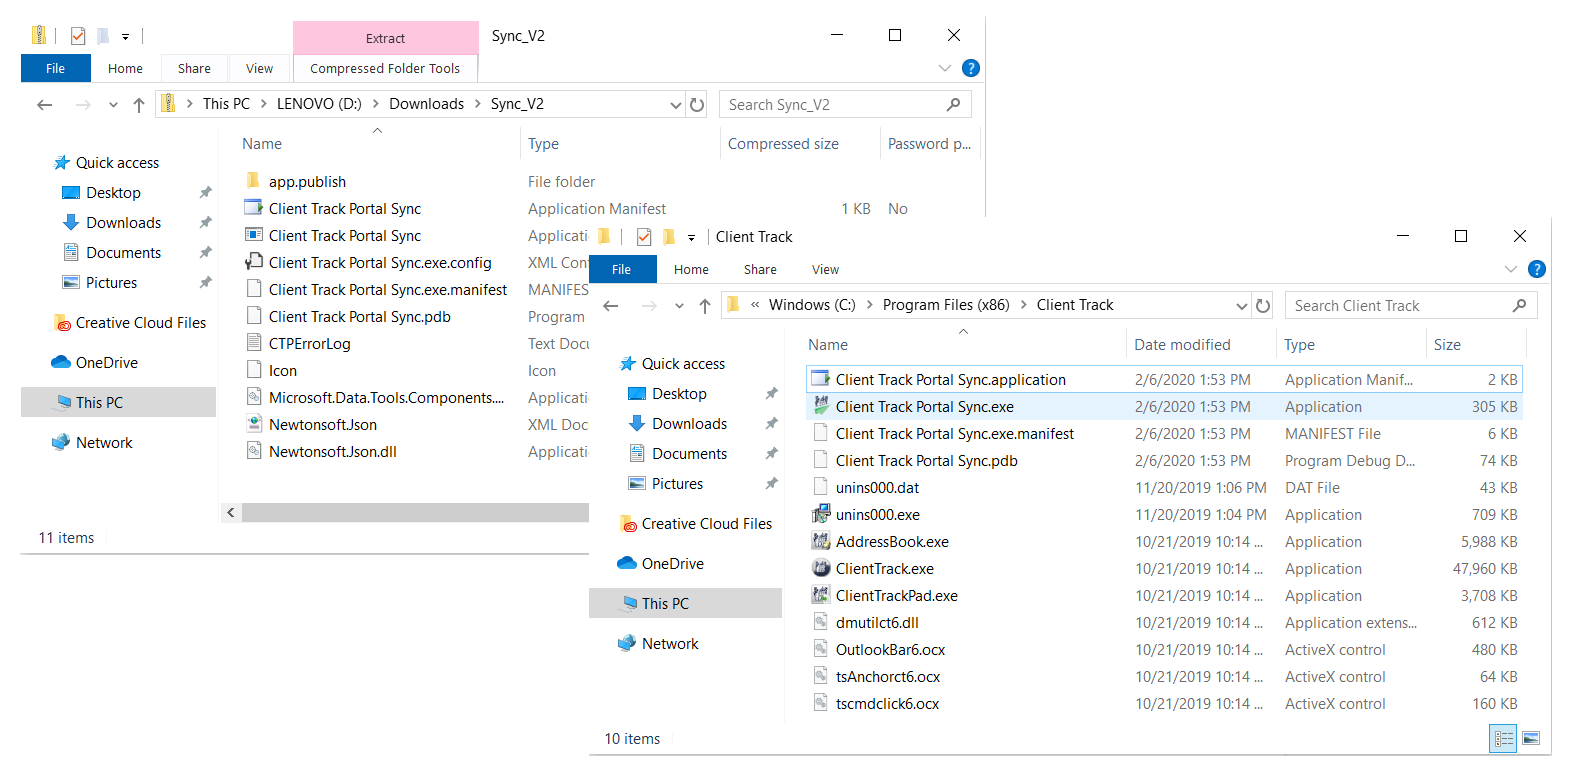
Step 3 - Install Add-In Customization
Open a second file explorer window and go to the C drive -> Program Files (x86) -> Client Track folder. If there is no Client Track folder, you can just create a folder in your documents called 'Client Track Portal Sync.' It doesn't matter where the sync is, we typically just put it in the Client Track folder as it is easier to remember where it is located.
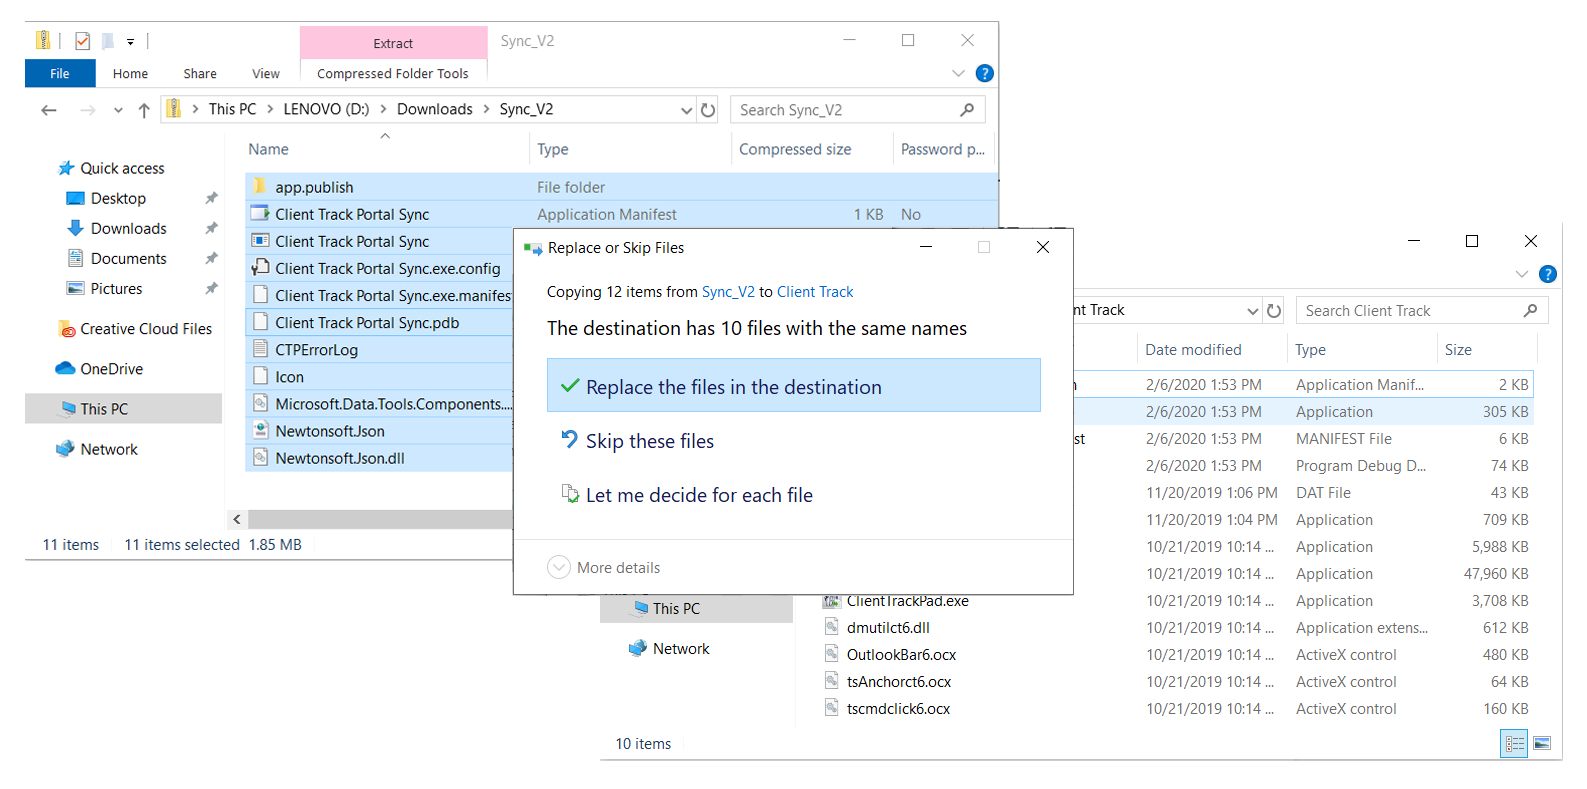
Step 4 - Replace the Files
Select all the files from the first file explorer window and drag and drop them into the second window, to either the Client Track folder you navigated to, or the new folder you just created. It will ask you to replace them if you put them into the Client Track folder, replace all of them. If you created your own folder, copy all the files into there
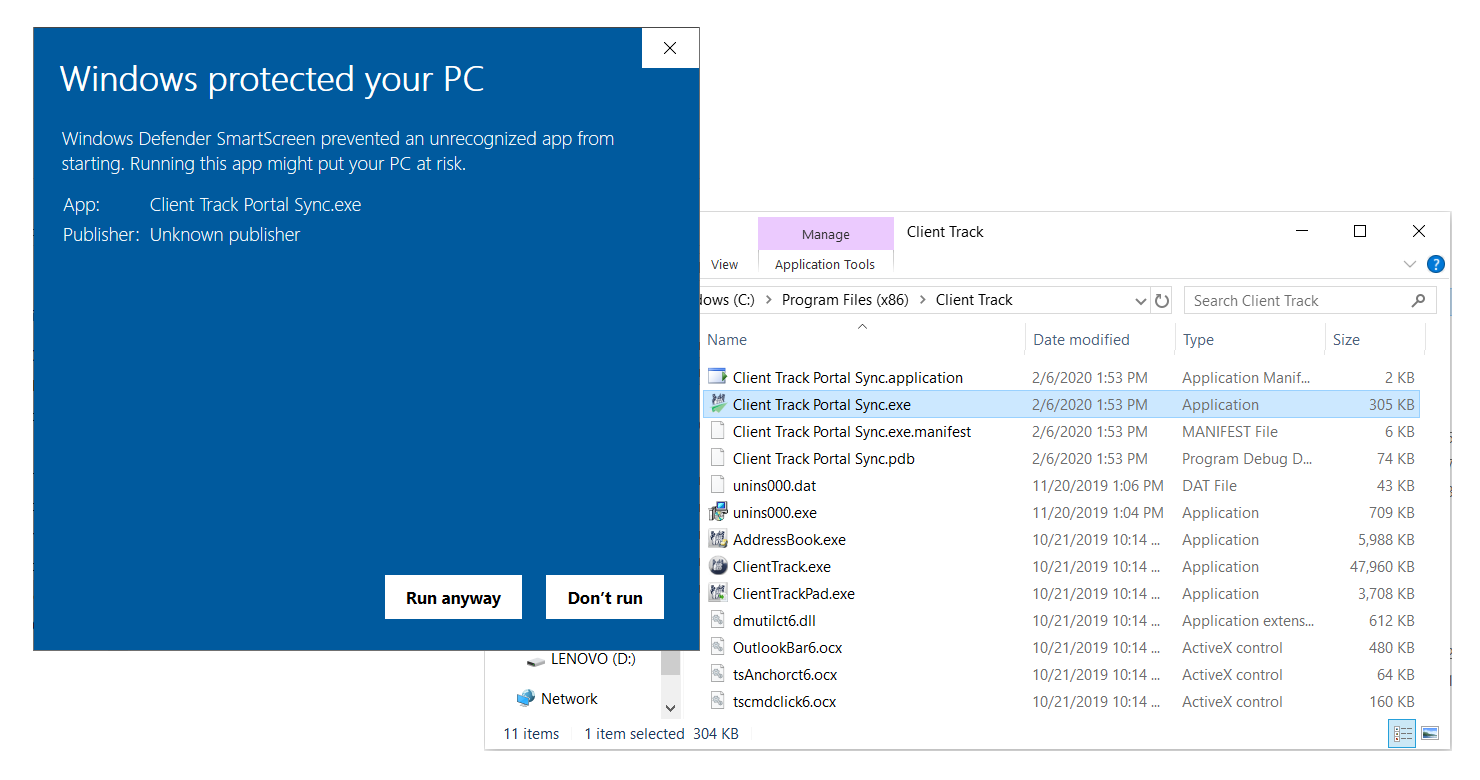
Step 5 - Open the Portal Sync
Once they are copied over, double click the Client Track Portal Sync to open it up. Windows may try and block the sync, so if you get a blue box that says "Windows Protected your PC" click "More Info" and click "Run Anyway." This will open up the sync wizard. You may have to select the CTD file if the sync didn't automatically pick it up. The CTD file is the file where all your information is stored on Client Track Desktop. If you do not know where your CTD file is located, open up Client Track Desktop -> Tools -> Data File Wizard. This will then show you the path to your current CTD file.
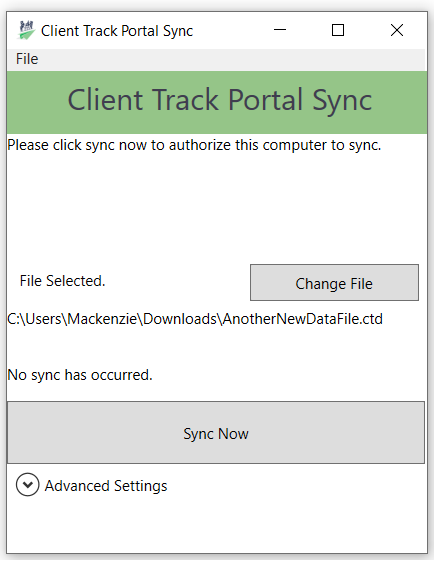
Step 6 - Select your CTD File
Select your CTD file on the sync wizard and click sync now
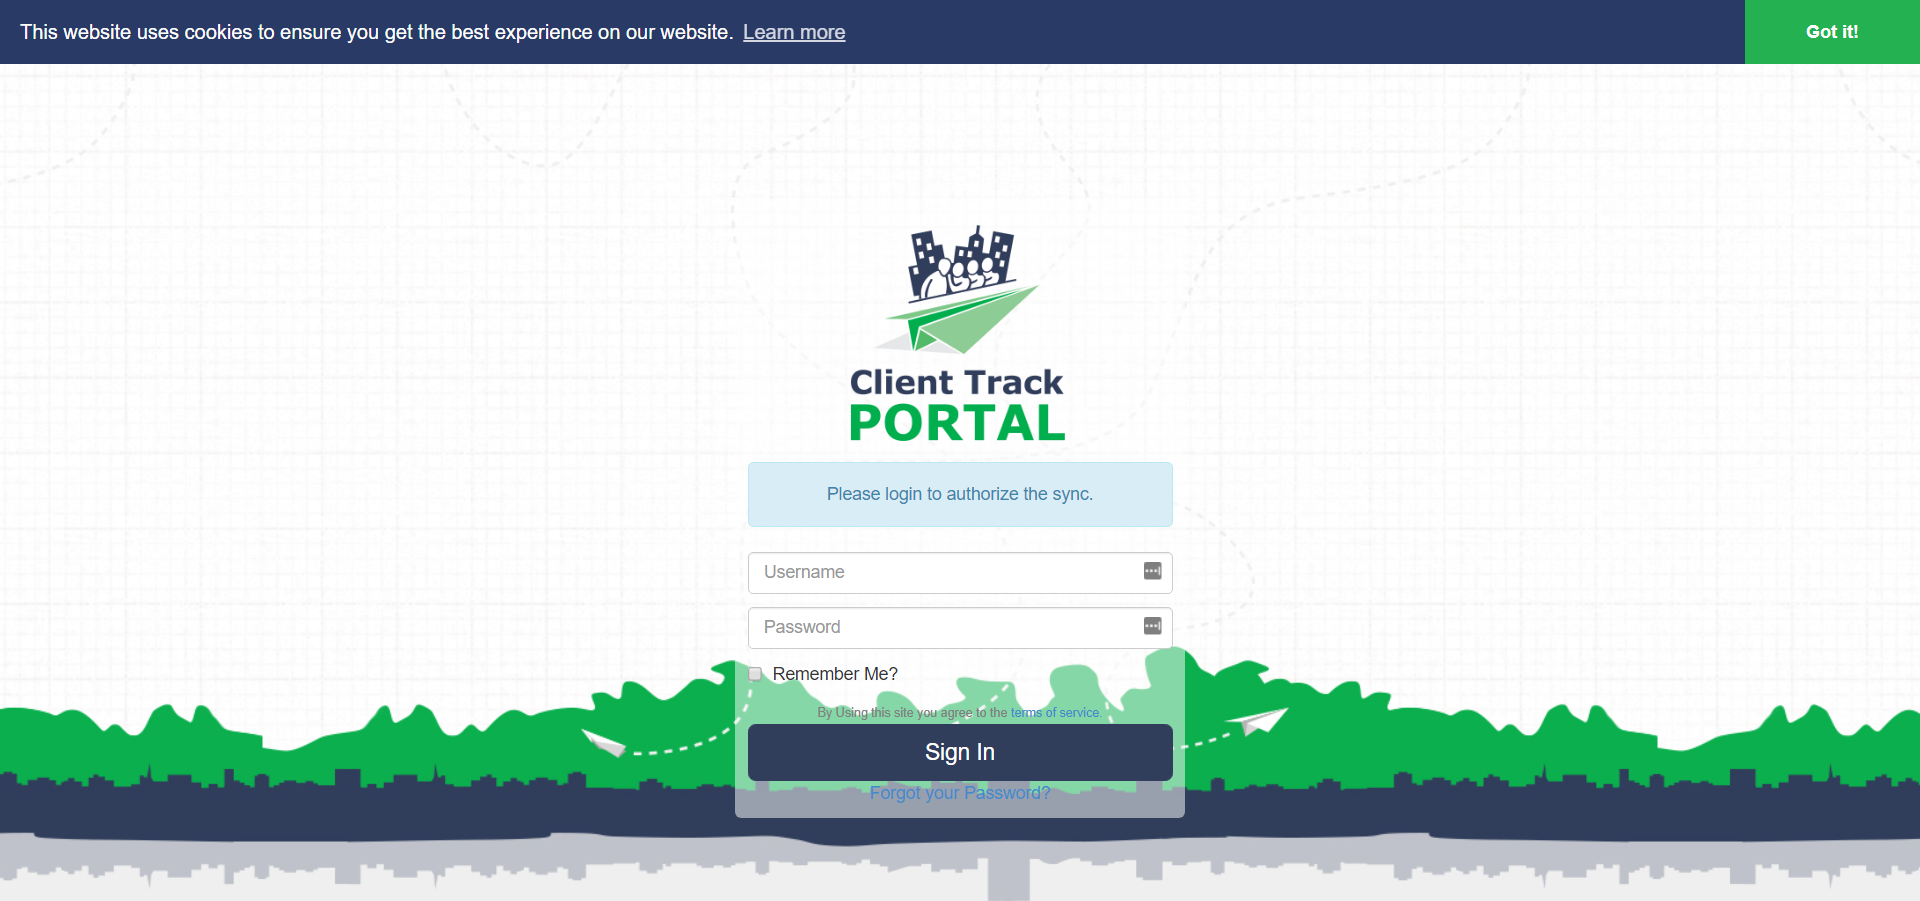
Step 7 - Authorize the Sync
If you have not synced before, you will get taken to a page in the browser where you have to login to the Portal to authorize the sync. If you have synced before, your sync will start running.
Step 8 - Approve the Sync
Once you login you'll get a page where you can approve or deny the sync. Click approve.
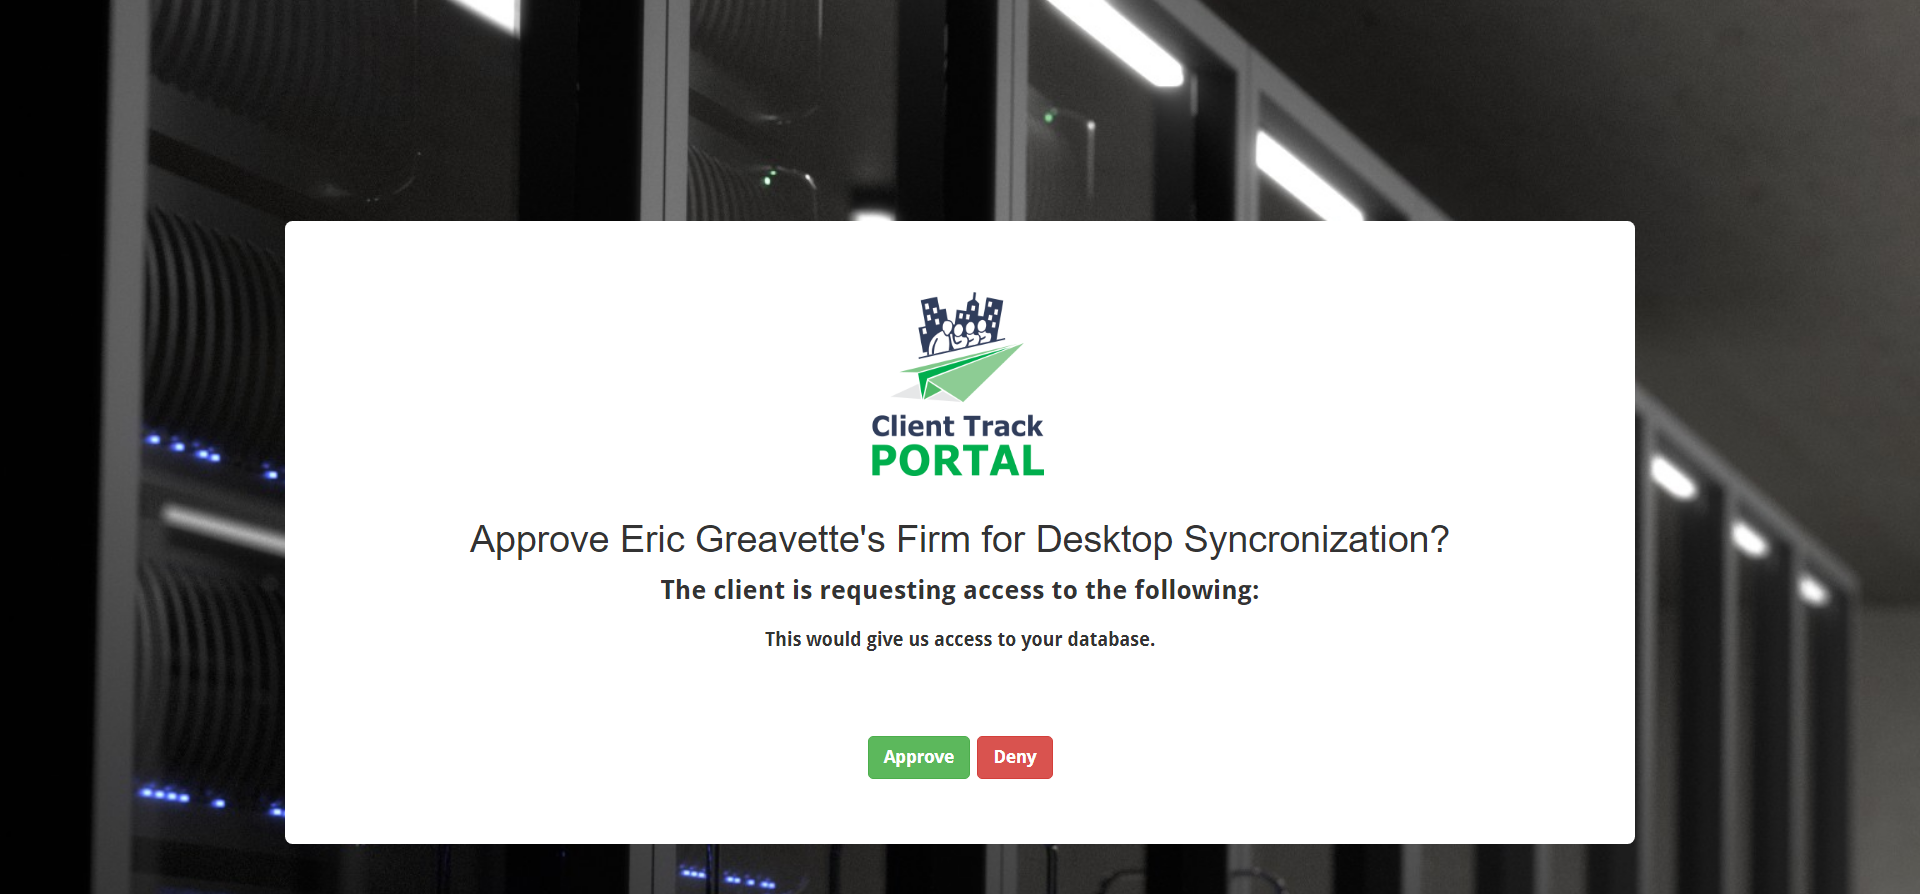
Step 9 - Close the "This page is not working" tab
Once you click approve the page will then say something along the lines of "this page is not working" this means the sync is currently running and you can just close that tab. Open the sync wizard back up and it will show you the progress of the sync. The length of the sync depends on how large the CTD file is. It typically takes maximum 20 minutes.

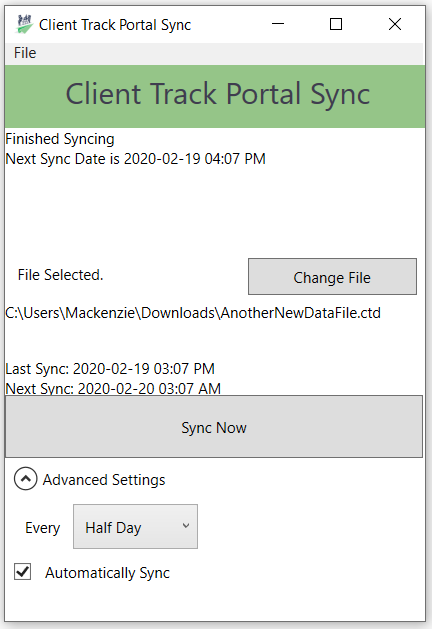
Step 10 - Setup the Automatic Sync
Once the sync is finished running it will say "finished syncing." The last step you have to do is set up the automatic sync. Under the sync now button will be an advanced settings. Expand the settings and from the dropdown choose "half day" and make sure the automatically sync checkbox is checked off.
Step 11 - Minimize the Sync
Lastly, minimize the sync and it will be stored in the hidden icons on your computer. To find hidden icons, click the ^ (up arrow) on the bottom right of your taskbar near where your computer displays the time. Don't exit out of the sync as this will close it and the sync won't automatically run. The sync will now run automatically in the background every half day as long as the computer is on and logged in. The sync will not run unless you are logged into the computer, and only needs to run off one computer. The sync pushes all the information to every Accountants' Portal account.
1-866-423-8525
................................................................