Toll-Free: 1-866-423-8525 I sales@clienttrackportal.com
Toll-Free: 1-866-423-8525 I sales@clienttrackportal.com
Ability to send secure emails & encrypted files right from MS Outlook without needing to log into the Client Track Portal. Follow the instructions below on how to setup and use our Outlook Add-In.
Do you use Outlook Online or NEW Outlook?
View setup instructionsStep 1 - Outlook Add-In Installer
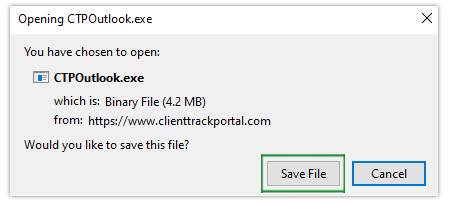
Download and install the Outlook Add-In setup file by clicking the button below.
Download Outlook Add-In InstallerClick Save File to being the installation setup.
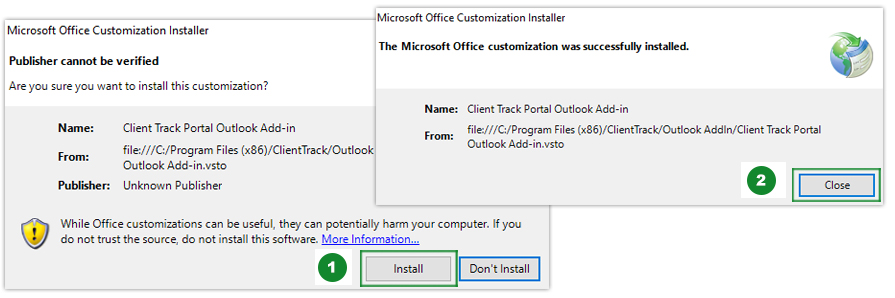
Step 2 - Add-In Setup Wizard
In Outlook Add-In setup wizard, click Install (1) and then click Finish (2) to complete setup wizard.
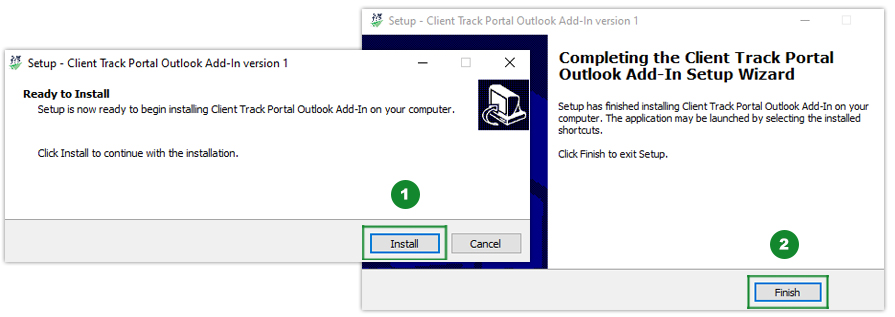
Step 3 - Install Outlook Add-In
In the add-in popup, click Install (1). After the Outlook Add-In has been successfully installed, click Close (2).
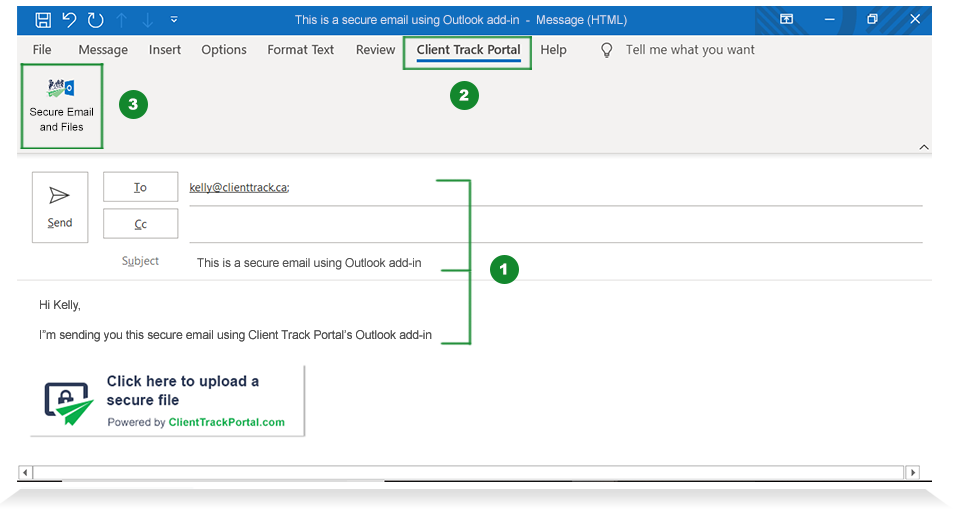
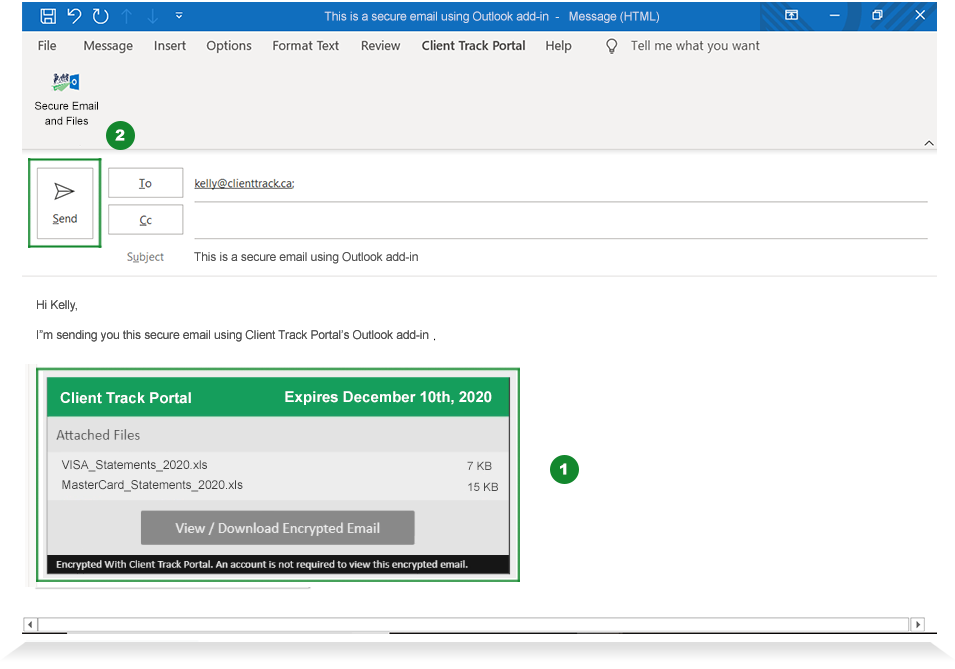
Step 1 - Outlook Add-In
Enter recipient's email, subject and message (1). Click the Client Track Portal tab (2) and then click Secure Email and Files (3).
Step 2 - Secure Your Email/Files
Select type of email from drop-down (1), enter password and password hint (2) and then click Add Files (3) to upload encrypted files. When ready, click Encrypt (4).
*** If you are sending a Secure e-Signature Request, you'll be able to see how many e-Signature Documents you have left.
Secure Email - If you want to send a simple secure email & files to recipient
Secure Document Request - If you want to send a secure email requesting documents from recipient
Secure e-Signature Request - If you want to send a secure email & upload PDF documents to be signed by the recipient

Step 3 - Send Secure Email/Files
After files have been uploaded and encrypted, click Send (2) to successfully send secure email/files.
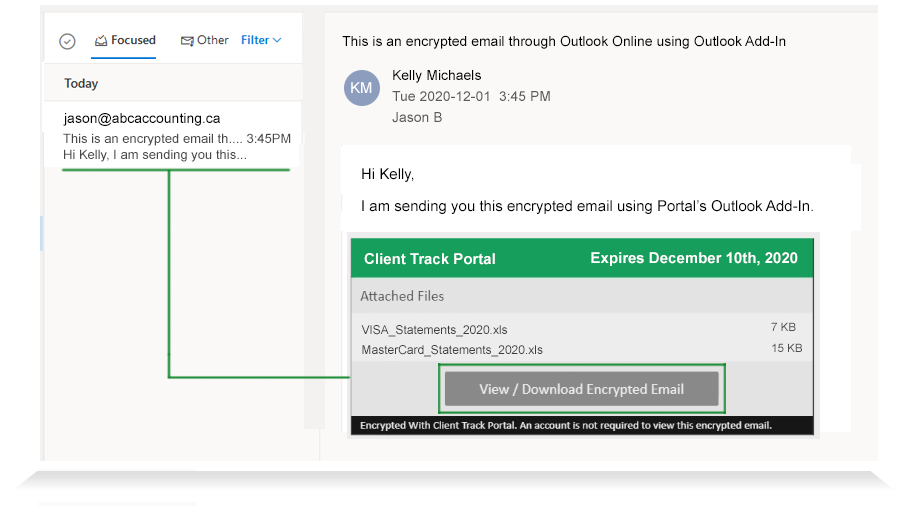
Step 1 - Email Notification
After email has been sent, the recipient will receive an encrypted email notification including a preview list of all of the uploaded files. To view the encrypted email content and files, click View/Download Encrypted Email.
*Note - No Portal account required to view encrypted email.
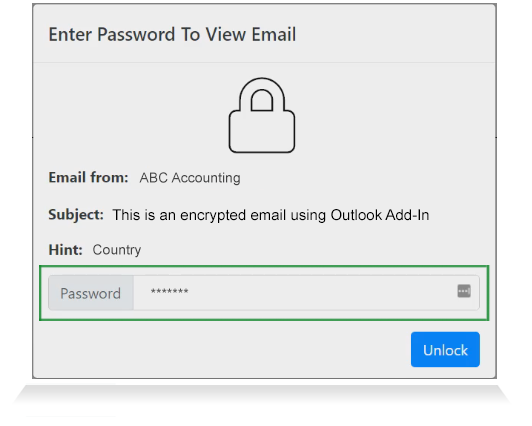
Step 2 - Unlock Encrypted Email
Enter in the password based on password hint and click Unlock to view encrypted email.
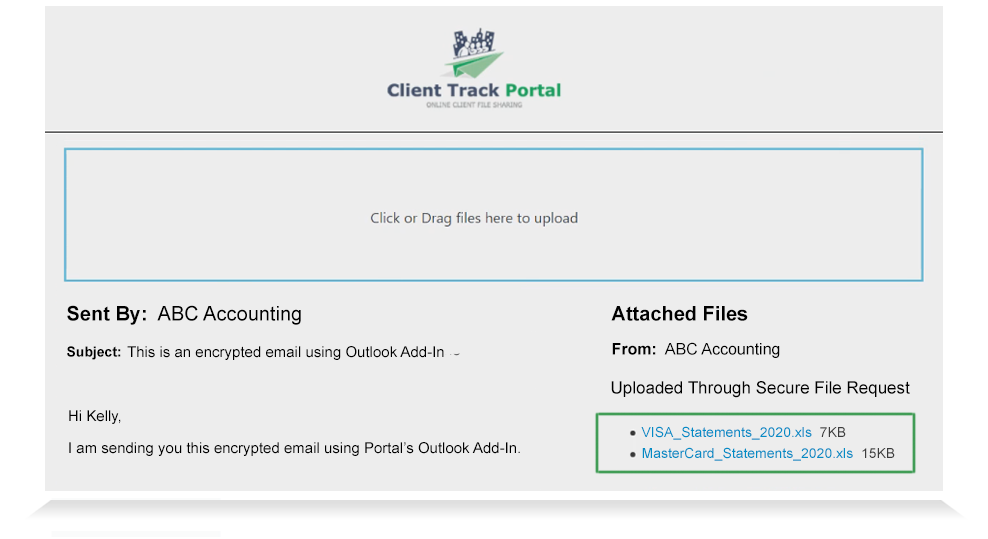
Step 3 - View Encrypted Email
In the encrypted email, you will see an email message from sender and attached files ready for download.
*Note - The encrypted email with attached files will expire based on deadline date as indicated in the email notification (See Step 1).
1-866-423-8525
................................................................