Toll-Free: 1-866-423-8525 I sales@clienttrackportal.com
Toll-Free: 1-866-423-8525 I sales@clienttrackportal.com
In addition to Secure Email Send & Secure Document Request, Client Track Portal also gives you the ability to send Secure E-Signature Request email to recipients requesting attached PDF document to be signed electronically.
Check out our Secure e-Signature Request tutorial video >
Step 1 - Send Secure Email & Files
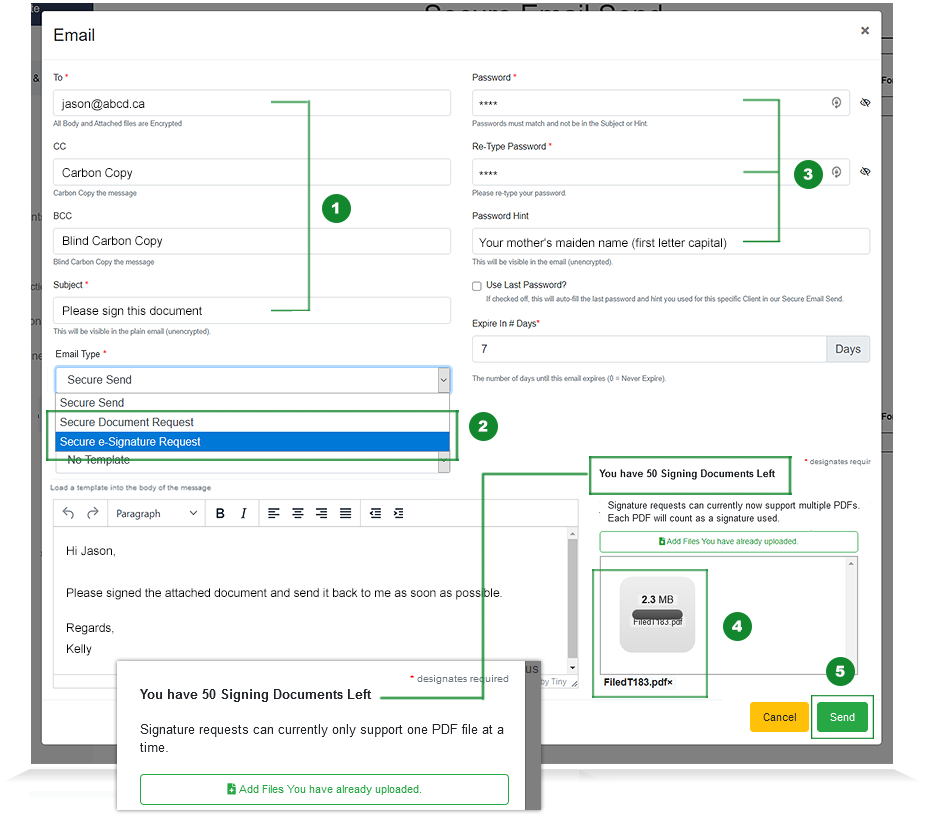
Log into Client Track Portal, click on Send Secure Email & Files (1) on left sidebar and then click Compose Email (2).

Step 2 - e-Signature Request & Upload PDF Documents
In the secure email form - add the recipient's email, subject title, password, password hint (3) and expiry date. For email type, select Secure e-Signature Request from drop-down. (2) Upload PDF document(s) for signing (4) and click Send (5)
Note: You can upload multiple PDF documents for signing in a single e-Signature request.
Step 3 - Create e-Signatures
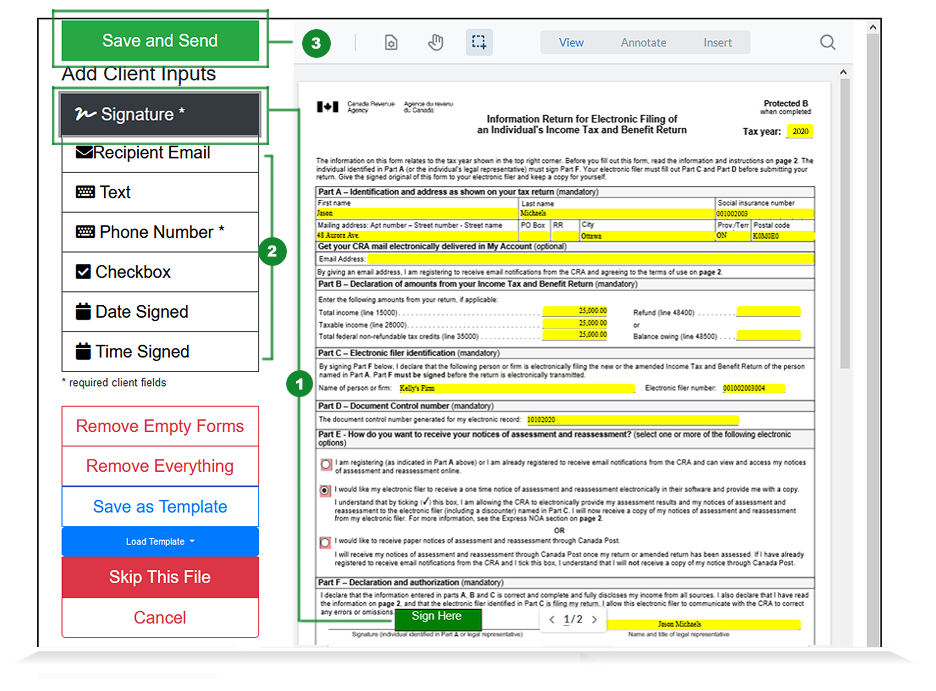
To create e-Signature to PDF document, click Signature (2) on left sidebar and place the box on the signature field. You also have the option to add other input fields for recipient (2).
*Note - After applying signature field to PDF document, click Save and Send on top (3).
Step 1 - e-Signature Request Email Notification
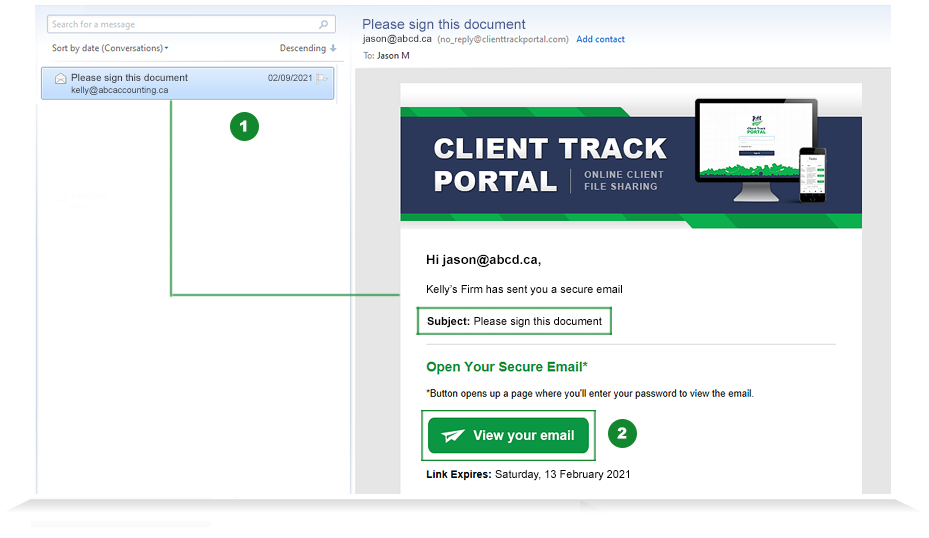
Open your email inbox to find that someone has sent you an secure e-Signature request email from our Client Track Portal. The secure email lists who sent you the email, subject of email, the view email link and a deadline to open up email. Click View your email.
Step 2 - Unlock e-Signature Request Email
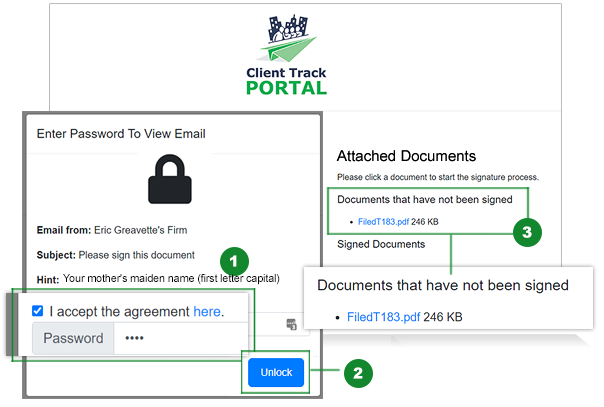
Check off 'I accept the agreement here' and enter in password (1) based on password hint provided to you. Click Unlock (2) to view the attached file(s) that need to be signed (3).
Step 3 - Sign PDF Document
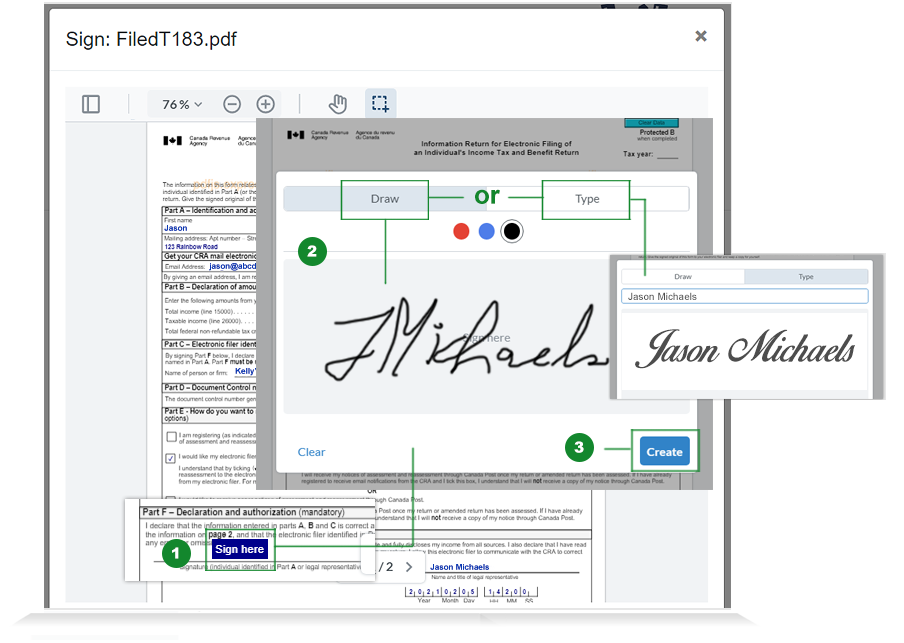
Verify your information on PDF document and then click Sign Here button (1). In the e-Signature window, click Draw or Type (2) and sign your name within the box area using your mouse or stylus on touchscreen.
*Note - Your e-Signature needs to be unique that proves your identity. Drawing an 'X' can't be identified as you.
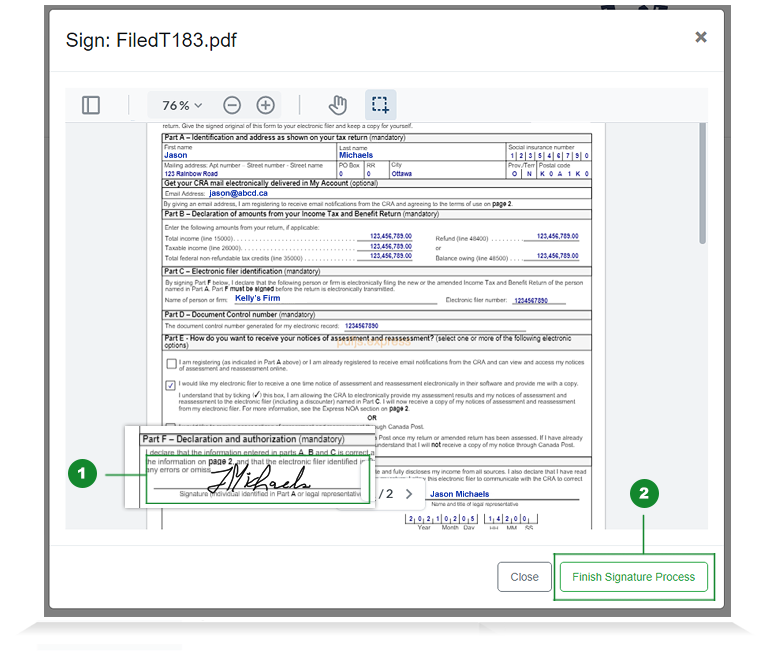
Step 4 - Finish e-Signature Process
After adding your e-Signature to PDF document, click Finish Signature Process.
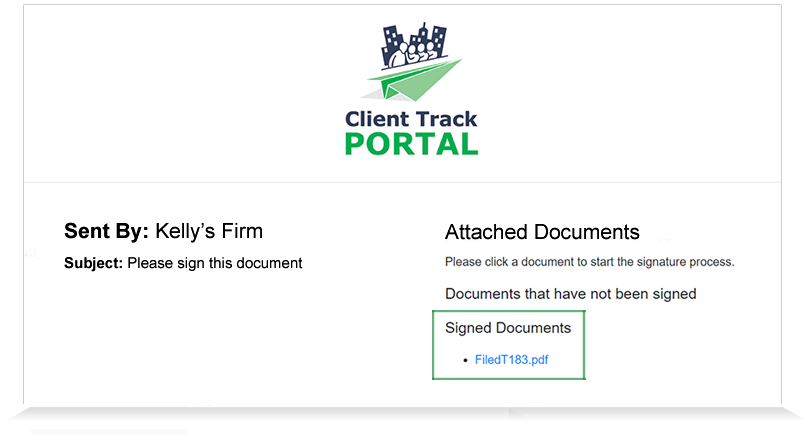
Step 5 - Signed Documents
In the secure email, signed PDF document(s) now appear under 'Signed Documents' on right sidebar.
Virtual Filing Cabinet
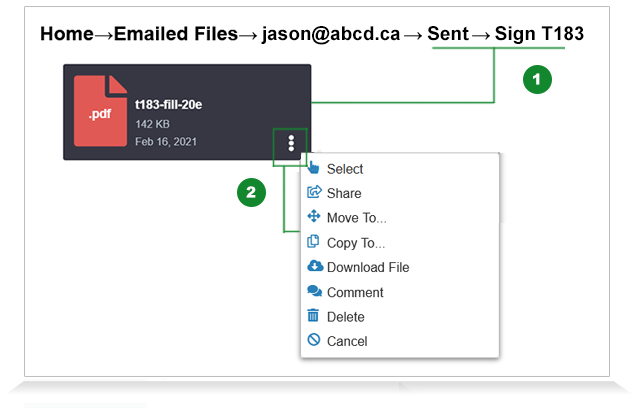
Log into Client Track Portal and click on Virtual Filing Cabinet (1) on left sidebar and then click Emailed Files folder (2). Open the recipient's email address folder that you sent e-Signature request to and click Sent folder (3).
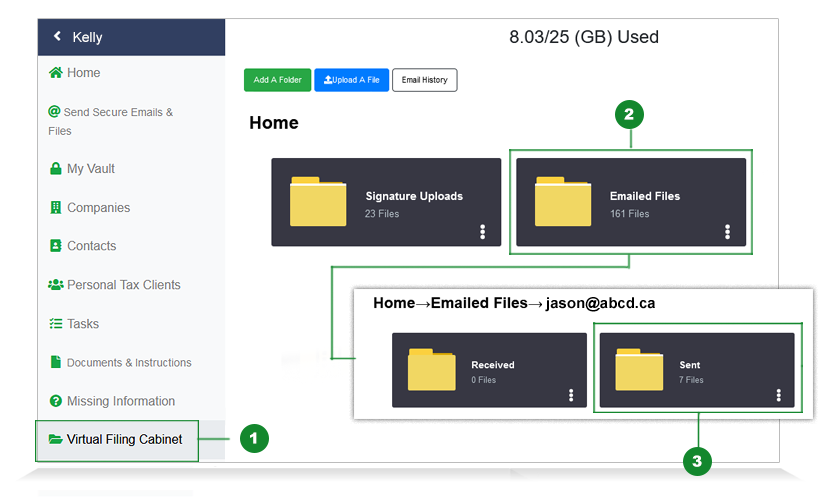
Browse to the appropriate folder to find the signed PDF document. (1) Click on the three dot (...) icon on bottom right corner of PDF document to open up options and click Download File (2). After downloading is complete, double-click on PDF document to open.
*Note - If you receive a 'At least one signature is invalid' message when opening PDF document in Adobe Acrobat, it is NOT due to our e-Signatures being invalid. This issue appears to be in Adobe Acrobat Reader DC versions 2021.001.20135 and higher which has been fixed with Adobe Acrobat Reader DC version 2021.001.20140 - please update your version.
Email Dashboard
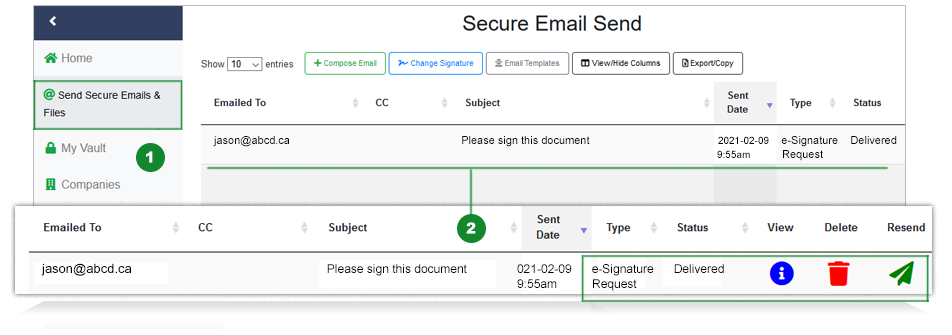
You can view all emails sent including e-Signature Request on your main email dashboard by going to Send Secure Emails & Files (1) from left sidebar. From here, you can view the status of email, delete or resend email and change password all at a glance. (2)
1-866-423-8525
................................................................